A Guide to Prepare Your Home for a Power Outage in Illinois

prepare-illinois-home-for-power-outage-gdm

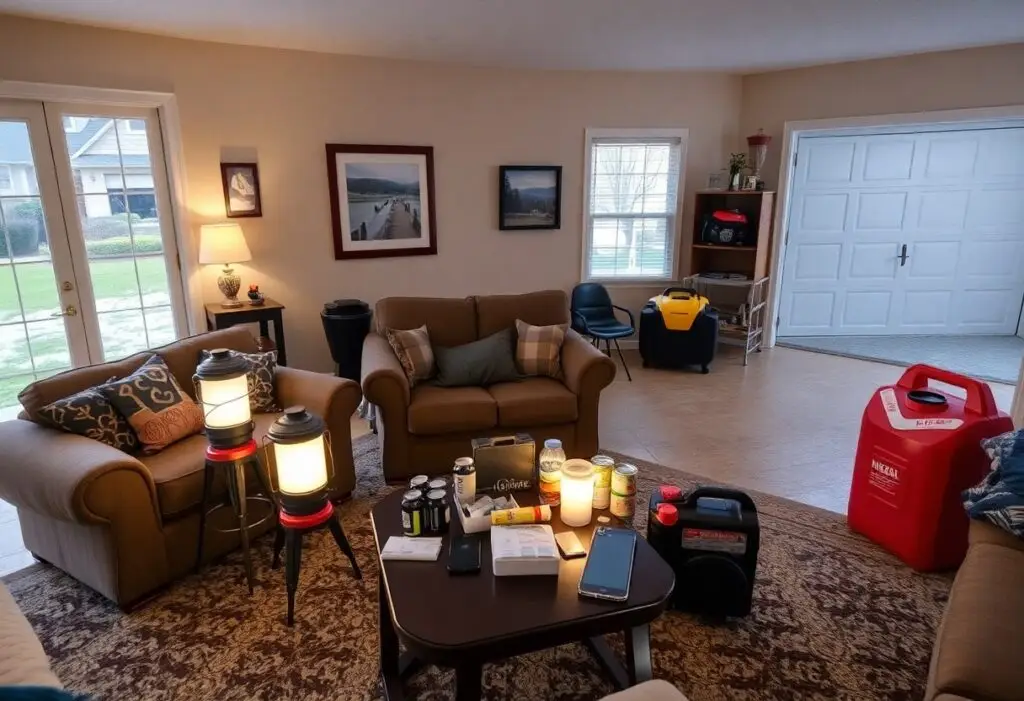
Home outages in Illinois can leave you without heat or refrigeration; you should stock water, food, a battery-powered radio, and a CO-safe generator plan to avoid carbon monoxide poisoning and frozen pipes. Key Takeaways: Assessing Regional Illinois Climate Factors Illinois weather varies by region, so you need to account for ice storms, blizzards, tornadoes and […]

10 Practical Steps For Maintaining Home Generators

10-steps-to-maintain-home-generators-rei

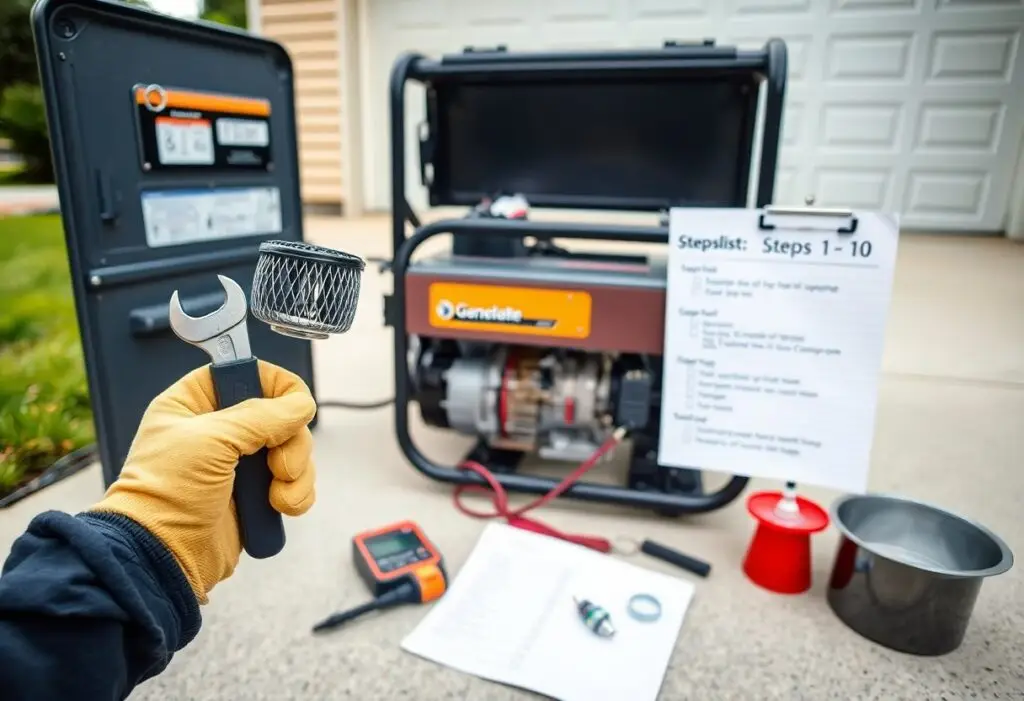
In this concise, authoritative overview you’ll learn 10 practical steps to keep your generator safe, efficient, and dependable; focus on routine safety inspections, mitigate fuel-storage and carbon monoxide dangers, perform timely oil and filter maintenance, and test systems regularly so your backup power remains reliable when you need it most. Check fuel level You should […]

9 Easy Steps To Extend The Life Of Your Home Generators

It's imperative that you follow simple, scheduled care to keep your generator reliable and long-lasting; by performing regular maintenance, using fresh fuel, and practicing safe storage you can avoid costly failures and maximize performance. You should test under load, check oil and filters, and guard against carbon monoxide and electrical hazards; doing so protects your home and ensures trusted performance when power is out. Regular inspections and visual checks Inspect your generator visually on a set schedule so small issues don't become big failures. Scan for fuel or coolant puddles, loose wiring, worn belts, and corroded battery terminals; check mounts and exhaust soot for stress signs. When you spot wetness, soot, or a burning odor act immediately-these are direct safety hazards. A fast weekly glance plus a deeper monthly walkaround with the unit running under load can cut emergency repairs and extend service life. Weekly/monthly inspection checklist (Step 1) Each week check oil level, coolant reservoir, fuel lines, air filter, visible wiring and battery voltage (a healthy 12V battery reads ~12.4-12.7V at rest). Monthly, run the generator under load for 30 minutes, inspect exhaust for black smoke, verify belts have no cracks, torque loose hardware, and clean battery terminals. Plan oil changes every 100 hours or annually and replace filters per the manufacturer. Spotting common wear, leaks and warning signs (Step 2) Watch for dripping fluids, a steady fuel smell, smoke, unusual vibration, or rough idling-each can indicate a failing gasket, hairline hose crack, or fuel leak. Inspect hoses for swelling or hardening, clamps for rust, and wiring for melted insulation. Even a few drops per hour from a fuel line is a serious fire risk; treat any wet spot under the unit as an active fault until proven otherwise. To find subtle problems, run the generator briefly under load and use a flashlight to inspect joints, hose fittings, and the fuel pump area; place cardboard beneath the unit to reveal slow drips. Apply a UV dye to fuel if leaks are elusive, and use a digital multimeter to confirm battery voltage under no-load and while cranking. Replace hoses older than five years, swap belts with visible fraying or >½" play, and clean terminals with a wire brush, then coat with dielectric grease to prevent recurrence. Routine fluids and consumables You track oils, coolants, filters, batteries and fuel as part of routine care: change engine oil every 100-200 hours or at least annually, flush coolant every 2 years, and swap filters on schedule to prevent wear. Using the manufacturer-specified grades and OEM parts reduces wear and avoids warranty issues, while proper disposal and logging of dates/hours keeps your generator reliable during long standby periods. Oil changes, filters and scheduled replacements (Step 3) You should change oil and oil filters at 100-200 hours or annually, use synthetic where the manual allows, and replace air filters every 250-500 hours. Swap spark plugs and fuel filters per the service schedule, torque drain plugs to spec, and check dipstick before load tests. Old oil contains acids and particulates that accelerate bearing and valve train damage, so staying on schedule preserves performance and life. Fuel system care, stabilization and additives (Step 4) You must stabilize stored gasoline if the generator sits more than 30 days, keep tanks full to limit condensation, and drain water separators regularly. Replace fuel filters every 200-500 hours and use diesel biocides/anti-gel treatments in cold months. Contaminated fuel or water fosters microbial growth and injector corrosion that can cause unexpected failure, so proactive fuel care prevents expensive repairs. Use a quality stabilizer (many products protect gasoline for up to 12-24 months per label), follow manufacturer dosing, and run the generator under load 20-30 minutes monthly to circulate treated fuel. For diesel, test for water and change primary/secondary filters at recommended intervals; in commercial fleets, consistent stabilizer use and monthly runs cut fuel-related service calls significantly by keeping filters clean and injectors functioning. Battery and electrical system care Your generator’s electrical heart is the battery, starter, alternator and wiring; neglecting any link invites no-starts, hotspots or fires. Test batteries with a multimeter and conductance tester every 3-6 months, keep terminals clean and tightened, and protect wiring runs from heat and vibration. Maintain charging at 13.8-14.4V when running and a resting voltage of ≥12.6V. Treat corroded connectors and frayed insulation as immediate safety hazards and fix them before the next power outage. Battery testing, charging and terminal maintenance (Step 5) You should load-test or use a conductance tester every 6 months and check resting voltage monthly; a 12V battery should read ≥12.6V at rest. Top up flooded cells with distilled water per manufacturer intervals and use a quality charger set to 13.8-14.4V bulk, ~13.2-13.6V float. Clean terminals with a wire brush and baking-soda solution, then apply dielectric grease and torque clamps to spec to prevent voltage loss and corrosion-related failures. Starters, alternator and wiring integrity (Step 6) Inspect starter solenoid connections and alternator mounts for looseness or heat staining, and confirm alternator charging between 13.8-14.4V under load. Check wiring for brittle insulation, chafing or frayed wiring that can short to ground; replace damaged sections with properly gauged cable (starter feeds often use 4-2 AWG depending on engine) and secure grounds to bare metal. Loose or corroded connections are a leading cause of intermittent starts and overheating. For deeper diagnostics, measure cranking voltage under load-if it drops below 9.6V during cranking you likely have high resistance or a weak battery; perform a voltage-drop test across positive and negative starter circuits, aiming for 80%) and set thermal/current protection to shut down at defined overload points-this combination of monitoring and automated control both protects the genset and keeps critical systems running. Environmental protection and siting Place your generator on a level, 4-inch concrete pad at least 3 ft from doors, windows and vents to limit carbon monoxide and fumes; many home standby units emit ~60-70 dBA at 7 m, so factor noise toward property lines. Include a spill tray or 110% secondary containment for any bulk fuel, slope the site to divert runoff away from wells and storm drains, and comply with local environmental permits-spills, groundwater contamination and noise complaints are the most common, costly issues. Shelter, ventilation, fuel storage and weatherproofing (Step 9) Provide a weatherproof enclosure rated NEMA 3R or higher with louvered intake and exhaust to maintain combustion air and prevent water ingress; maintain manufacturer-specified clearances and a sheltered, sloped roof to shed rain. Store fuel in approved containers or a double‑walled tank with spill containment, locate fuel at least several meters from the unit and living spaces, and seal electrical penetrations to keep moisture, pests and salt spray from damaging controls and wiring. Vibration control, grounding and corrosion prevention Mount your generator on elastomeric isolators or anti-vibration pads to cut transmitted vibration by up to 70-90%, use flexible exhaust connectors to prevent stress, and anchor with grade‑rated fasteners per the manual. Bond the frame to a driven ground rod with a #6 AWG copper conductor where codes permit, and protect metal with stainless hardware, marine-grade paint or sacrificial coatings in coastal environments to reduce rust-driven failures and electrical hazards. For performance and safety, you should measure chassis-to-earth resistance after installation-aim for under 25 Ω and lower if utilities or local code require it-and retest annually. Select antivibration mounts by dynamic load (typical deflection 5-12 mm) to match your unit’s running torque; replace cracked mounts and worn flexible connectors at first sign of fatigue, and apply corrosion inhibitors to terminal blocks and connectors to prevent high-resistance joints that cause overheating and nuisance tripping. Records and professional service You should keep a single, accessible record for every service, test and repair so technicians see the full history at a glance; logs reduce repeat visits and increase uptime. Include dates, runtime hours, part numbers and photos of wear, and schedule an annual inspection plus extra checks after storms or long outages to catch issues before they become failures. Maintenance logs, parts tracking and schedules Create a simple spreadsheet or use maintenance software to log runtime hours, oil changes, air/fuel filter swaps, battery tests and fuel polishing. Note part numbers and supplier info for filters, spark plugs and belts so you can reorder fast. Follow common intervals: oil every 100 hours or annually, air filters ~200-300 hours, battery load test every 6 months and replacement every 3-5 years. When to hire certified technicians and safety inspections Call a certified technician for any fuel leak, smoke, unusual vibration, failed starts, low oil pressure or failed automatic transfer switch operation; these signs indicate safety risks beyond DIY scope. Arrange a professional safety inspection at least once a year and after 200-300 run hours, with a specific check for grounding, transfer-switch wiring and carbon monoxide mitigation to prevent fire or poisoning. Technicians can perform load-bank tests, combustion analysis and head-gasket checks that you can’t. For example, a service visit that discovered a cracked fuel line prevented a small leak from becoming a fire hazard; another routine overhaul at ~1,000 hours uncovered coolant contamination before engine damage. Keep invoices and tech notes in your log so you and future technicians know what was done and when. Summing up So follow the nine easy steps-regular inspections, timely oil and filter changes, proper fuel storage and rotation, battery care, load testing, sheltering, and scheduled professional service-to maintain trusted performance and extend your generator's life; by staying proactive you minimize failures, protect your investment, and ensure reliable backup power when you need it most.

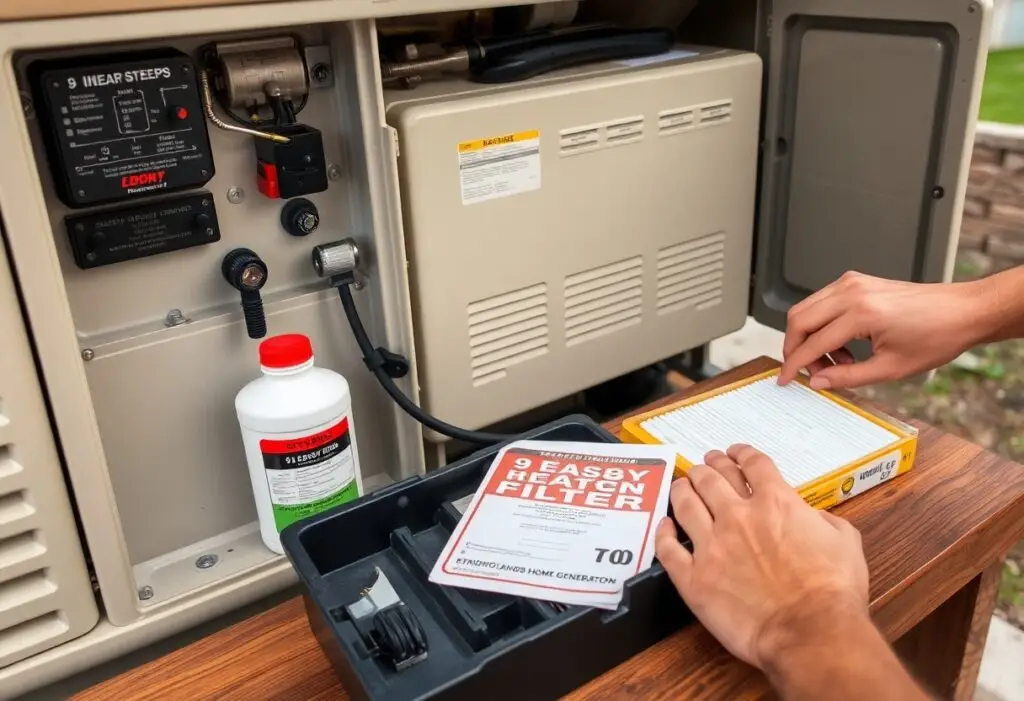
It’s imperative that you follow simple, scheduled care to keep your generator reliable and long-lasting; by performing regular maintenance, using fresh fuel, and practicing safe storage you can avoid costly failures and maximize performance. You should test under load, check oil and filters, and guard against carbon monoxide and electrical hazards; doing so protects your […]